Saturday, 30 May 2015

Great CAS(E) this Sketch and some more craft room organizing


Summer and crafting just don't seem to go together. There is so much to do, and the days just pass by so quickly. Of course the fact that I have also spent a few evenings just lazily falling asleep on the sofa while watching TV really doesn't help either, does it? But today I'm home alone and after having finished my rat shopping in the morning (yes, the babies have to eat although daddy is out and about), I did camp out in the craft room and have been multitasking crafting, getting inspired, cleaning and organising.

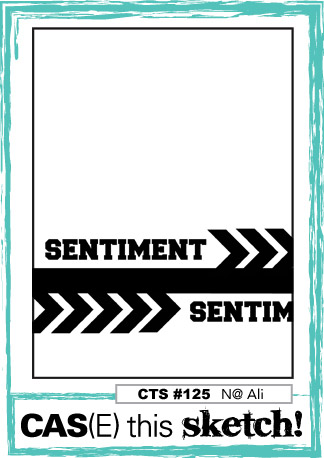
Today's card is inspired by the awesome sketch over at CAS(E) This Sketch. I was also inspired by the great colour combo over at Colour Me...! I am linking up over at Simon Says Stamp Wednesday Challenge where Anything Goes as well. I went for a very literal interpretation of the sketch this time. I created the chevrons in the background by colouring parts of the Positively Chevron background stamp using markers. I also coloured the Gorgeous Grunge stamps using markers to get the coloured splatters for the background.

I've also been organising my stamps and dies. I finally got the Avery Elle Stamp Storage pockets I ordered a while ago. I think my stamps look so much neater now that they are all in identical pockets. I have put in a cardstock sheet for support in the pockets along with the stamps. For sets with matching dies, I bought some magnetic sheets which I attached to black cardstock, and the dies stay beautifully organised on the magnetic sheets. I have popped the dies into the same pockets with the matching stamps, so now it's always easy to find the matching stamp sets and dies, and I know even the tiny little dies stay safe on the magnetic sheets and in the sealable pockets. Unfortunately some of the larger stamp sets don't fit in the pockets, so I have to figure out something else for them.


Stamps and dies stored in plastic pockets. Matching dies
are stored along with the stamp sets. 
Card: Stampin' Up Rich Razzleberry, Hobbycraft 160 gsm white card, scraps of Bermuda Bay and Tangerine Tango Card
Stamps: Stampin' Up Positively Chevron and Gorgeous Grunge
Ink: Stampin' Up Rich Razzleberry, Tangerine Tango, Bermuda Bay
Other: Stampin' Up Hello You dies


Wednesday, 27 May 2015

It would be rude not to...


If you get a stamp set as a birthday present, it would be completely rude not to make a thank you card for the person giving the gift using said stamp set. Am I right or am I right? My sister does know how to spoil me with the perfect present (me sending her a wish-list of stamp sets I would love to receive had nothing to do with it, I'm sure). And the cute Critters Down Under, along with the Critters at the Dog Park which was also included in the gift set were a perfect complement to my very animal themed birthday.

My inspiration for this card was the sketch over at Freshly Made Sketches. I was also inspired by the "Animal" theme over at Addicted to CAS. The challenge over at Lawnscaping in "Try a new technique", but they do say you are also allowed to use a new product. And products don't get much more new than this, I opened my birthday present and started stamping within about a microsecond. Last but not least I'm also linking up over at Simon Says Stamp Monday Challenge where the theme is "Thank You".


Card: White 300 gsm hammered white card, Daler&Rowney 300 gsm Aquafine watercolour paper
Stamps: Lawn Fawn Critters Down Under and matching dies, Violet's ABCs
Ink: Versamark Memento Tuxedo Black, Tim Holtz Distress Ink Brushed Corduroy, Mowed Lawn, Gathered Twigs, Vintage Photo, Pumice Stone, Forest Moss
Other: Lawn Fawn Say Cheese


Tuesday, 26 May 2015

Holly Jolly - Use Kraft


The last two weeks have flown by again. My favourite month of May is almost gone, and we are getting into serious summer now. But don't let the warm sun and beautiful flowers completely distract you from the fact that Christmas is coming although it's still a while away. So why not get inspired by our "Use kraft" challenge over at Holly Jolly and link up your fabulous Christmas creations for us to enjoy.

This time our generous sponsors are Eureka, The Stamping Boutique, Di's Digis and Melonheadz. The have given images for the DT to play with and will also be giving prizes to our winners. 
For my card, I got to play with the Poinsettia border digi from Eureka stamps. I printed the digi onto vellum and coloured using Copics. I coloured the borders using a gold Sharpie, and adhered the poinsettias onto kraft card. I stamped the sentiment from Stampin' Up Endless Wishes using Versamark and heat embossed using gold embossing powder. I added a few pearls for a finishing touch and coloured them using the gold Sharpie.


I am linking up with the following challenges:
Crazy Hazelnut's Crafty Challenge Extra - Anything Goes
Christmas Card Challenges - Anything Goes
Crimbo Crackers - Anything Goes
Stamping Sensations - Flower Power
Make My Monday - Use kraft
Retro Sketches - sketch


Card: Kraft cardstock, Dovecraft Premium 110 gsm vellum

Stamps: Eureka stamps digi Poinsettia border, Stampin' Up Endless Wishes
Ink: Versamark
Colouring: Copics R24, R46, Y19, Sharpie gold
Other: Gold embossing powder, Stampin' Up Basic Pearls coloured with gold Sharpie

Sunday, 24 May 2015

Party night in the woods


It has been the most amazing weekend. I didn't have anything exciting planned, but my sister turned up at my doorstep on Saturday morning, complete surprise. Apparently she had been plotting with the Culinary Consultant to surprise me and have a pre-birthday celebration (my birthday is on the upcoming Wednesday). And she did not turn up empty handed, but with a huge chocolate cake. And I dare say the day got even better from there as my birthday surprise was a visit to Hamerton Zoo Park, a huge zoo park less than half an hours drive from our home. I had no idea the place even existed, and we had a great day seeing all the animals, from birds and primates to the big cats and everything in between. And my special birthday treat didn't end there, my dear Culinary Consultant really did spoil me with a special experience where I got to go into one of the enclosures and meet the lemurs and feed them their dinner. I had lemurs crawling up in my lap and on my shoulders, and they let me stroke them. It was such a memorable experience and I am over the moon about it all.

Due to all the animal antics, there wasn't any room for crafty time yesterday. Today after a full day of shopping I did mange to put together a very animal inspired card (wonder where I got that idea from...). Apart from the animal inspiration, I was also inspired by the awesome sketch over at CAS(E) this sketch and ColourQ. I am also linking up with Lawnscaping challenge where the theme is "Try a new technique". For this card, my new technique was to try the new vellum adhesive I ordered the other day. I am always trying to find good ways of adhering vellum, as the ones I have tried so far have not been as invisible as I have wanted them to be. After trawling the interwebs for hints, I came across a crafting forum where I found a recommendation for Vellum glue dots, and ordered a pack. Looking at this card, they seemed to do the trick and I'm quite pleased with them as you really can't see where the adhesive is on the vellum (I put some in all corners of the vellum, and it does indeed seem to be invisible). So this was a great new technique to try!


Card: 300 gsm white card, Dovecraft 110 gsm premium vellum, Hobbycraft 160 gsm white card, coloured 240 gsm kraft card pink
Paper: Lawn Fawn Let's Polka Mon Amie 
Stamps: Lawn Fawn Joy To The Woods and matching dies
Ink: Tsukineko Memento Tuxedo Black
Colouring: Copics C1, C3, R43, RV19, YR04, Y23, Y15, Y19
Other: Lawn Fawn Stitched Rectangle and Hello dies 


Friday, 22 May 2015

Butterfly on crumpled vellum


Well it was the usual exciting drama on the way home from work... "Will I ever be able to change up to second gear, or will it be 27 miles in first gear?" Despite everyone and their best friend heading home at the exact same time as me, I eventually made it home to enjoy the beautiful warm sunshine and a glass of that cold very British drink you have on the lawn.

Then it was time for the pleasant part of Friday - crafty time. I absolutely love this week's colours over at Colour Me. I was also inspired by the Butterfly theme over at Friday Mashup. I was going to do the mashup of butterflies and lace, but I just couldn't find a place for the lace in the end, so this time it's just butterflies. I'm also linking up over at Make My Monday where the theme is Things With Wings and Creatalicious Challenges where the theme is Butterflies.


For the card, I started with inking a piece of vellum using Peeled Paint, Peacock Feathers and Squeezed Lemonade distress inks, and spraying with a mister. After drying the ink, I crumpled the vellum to give it some texture. I used the Lawn Fawn Stitched rectangle dies to die cut a frame from Bermuda Bay cardstock. I stamped the gorgeous Swallowtail stamp in Versamark and heat embossed with white powder, and coloured from the back of the image using Sharpies. I like using Sharpies for colouring vellum as it gives a bright enough colour to show beautifully through the vellum. The sentiment didn't turn out quite as I wanted it, I would have wanted to stamp the "hello" onto the vellum background, but I should have thought of that before crumpling up the vellum... So I had to come up with an alternative solution.

Card: Dovecraft premium 110 gsm vellum, Stampin' Up Bermuda Bay and So Saffron
Stamps: Stampin' Up Swallowtail
Ink: Tim Holtz Distress inks Peeled Paint, Peacock Feathers, Squeezed Lemonade, Versamark
Other: Lawn Fawn Stitched Rectangle dies, Stampin' Up Hello You die, Papermania Seafoam White embossing powder


Tuesday, 19 May 2015

A new card and a new craft room


I have finally had a chance to enjoy the new and improved craft room today. Getting home turned out to be a bit of an epic journey as we had the "pleasure" to endure the mother of all hailstorms. Visibility was zero to none. Luckily I made it back home safe, and now the sun is shining in through the windows of my little piece of crafty heaven.

But first, today's card. I was just itching to get to craft something and was browsing a few challenges for inspiration. I was quite taken with the STAMPlorations sketch as well as the colour combo over at My Favourite Things. I'm also linking up with the X, Y, Z challenge over at Simon Says Stamp Monday. I wanted to come up with something clever and exciting using X but in the end I had to settle with the boring Y is for yellow as my brain cells were in useless mode. Last but not least I'm also linking up with Suzy Bee's Bloomin' Challenge where the theme is Anything Goes/Just Add Pink.


In my mind, the borders on the sketch looked exactly like my Tim Holtz Vintage Lace die cuts. So I cut some and used them as a mask to ink through using three shades of pink distress ink. Then I used markers to colour the Stampin' Up Four Feathers stamps and die cut them with matching dies. Last I die cut the hello and matted everything onto pink card. I was tempted to add some ribbon or rhinestones, but decided less is more this time.

And then to the new craft room. Oooh, how I love my little room. I am convinced having your own rooms is the secret to a happy relationship (check in on me again in a few years to see if said happy relationship still exists...). The new Ikea organiser went in, one of the desks moved up to the loft making room for my old and faithful sofa for those lazy Saturday mornings when I want to slouch with a cup of coffee and browse blogs for inspiration. Of course I wanted my Ikea unit to look like the one below. 
This is what I wanted my craft room shelf to
 look like (click image to be taken to the source)
But then I thought about how hard it is to get away with robbing a bank, and settled for some DIY hacks instead. I am still waiting for a lot of stuff to arrive in the post to be able to finish organising my stamps and dies which is why it all looks a bit unorganised yet. Most things haven't found their places yet, but I'm sure that things will fall in place. And I have so many plans, there will be a much bigger desk one day. Also, although you can't see it in the picture, there is a whole white wall above the sofa which needs pictures. But that will all be a project for another day.  


The empty shelf is where my camera lives, but
for obvious reasons, it could not be included in the picture.
Card: kraft card, Hobbycraft 160 gsm white card, coloured 240 gsm card raspberry
Stamps: Stampin' Up Four Feathers and matching dies
Inks: Tim Holtz Distress inks Spun Sugar, Picked Raspberry, Worn Lipstick, Stampin' Up Blushing Bride, Melon Mambo, Summer Starfruit
Other: Tim Holtz Vintage Lace dies, Lawn Fawn Hello die

Sunday, 17 May 2015

Scrap paper storage


My craft room re-arrange is still ongoing. Lots have happened, the Ikea storage unit has gone up and most of my crafty stuff has started to find it's new home. I have organised my papers and dies. Next, I'm waiting for some storage bags so that I can re-arrange all my clear stamp sets into a more aesthetically pleasing display. I'm also so tempted to buy some ink pad storage for my Tim Holtz inks, but I can't really justify the expense, so I think I will try to see if I can create something myself instead. After all, the whole point of crafting is that I should be able to create things myself, right?

A while ago I created a desk organiser from the very glorious raw material of TP rolls. As part of my re-arrange, my crafting desk has moved and it's now in front of the window. When I arranged all my things onto the desk again I realised that the little box that holds my leftover scraps of card and paper looked just horrible. So I decided to make a nice scrap paper holder to match my desk organiser. I also went through all my leftover scraps and threw away the slivers that were way too small to ever get used again and now I'm only keeping scraps which are a reasonable size and might see some use one day.


I started with a box that I happened to have lying around. I started by covering the box in a layer of gesso. Then I spread Mod Podge onto the lovely Tim Holtz Wallflower paper and covered the box with bits and pieces of the paper. I also clad the inside, not that it's ever going to be visible but I just felt like I wanted to finish the box appropriately. Once dry, I inked all edges using Tim Holtz Vintage Photo Distress Ink and added the lace washi tape on the top. I created the dividers from white 300 gsm card and again inked around the edges with Vintage Photo. I store my paper scraps according to colour: yellows and oranges, pinks and reds, purples, blues and turquoises, greens, neutrals, whites/creams and last multi-coloured patterned papers, so I coloured the tabs using Copics to indicate the colours. It most certainly looks better than my old tattered box, and I will try to keep my scraps organised in my new box. I only store small scraps in the box, larger scraps are stored together with each appropriate cardstock or paper. I can't wait to show off some of my other storage solutions as I finish things. 


I would like to link up with the following challenges:
A Vintage Journey - Spring Colours
2 Crafty Girls - Vintage 
Not Just Cards - Anything Goes